Mommy In Massachussetts

Everyday happenings in the life of a (not so) perfect mommy

Easy Tuna Bacon Cakes

I am a huge fan of cheap meals, especially delicious cheap meals.  And what can be cheaper than a couple cans of tuna, some bacon, and some sweet potatoes?  Add in a few extra spices and some green onions and you get these amazing Tuna Bacon Cakes, as originally seen on Multiply Delicious.  My version is a bit different because my hubby is not a huge fan of cilantro, but it follows the basics of her recipe.  Incidentally, I’d like to say here and now that I am making a vow to myself that whatever recipe I put on here next, it will be one of my own experimentation.  But as a last hurrah before things really go downhill, I wanted to give you these little babies.  Served with some avocado on top, or with a side of sautéed vegetables, these are a pleaser.  And they don’t take long to cook up, which is a plus if you are in a hurry.  Speaking of which, I’m in a hurry to write this post, so let’s get started!

INGREDIENTS!

IMG_0645

  • 2 Cans Tuna, drained (I’ve heard tell that tuna in oil is better for you, but I had tuna in water on hand)
  • 5 Smallish Sweet Potatoes, Diced, Boiled, and Mashed
  • 5 Strips Bacon
  • 3 Green Onions, Chopped
  • Garlic, Minced (as much or as little as you like, I used one clove)
  • 2 Eggs
  • Sea Salt to taste
  • Pepper to taste
  • 3/4 tsp Dried Rosemary Leaves
  • 2 Tbsp Coconut Flour (not pictured)

To start, get your potatoes prepped and rolling on the stove.  They will take the longest, so it’s better to get them simmering before you start with the rest, otherwise you’ll be waiting for them to catch up with you!  Once your potatoes are going, get your bacon ready.  I prefer to cut mine first before frying it, but some people like to cook their bacon first and then crumble it by hand.  It doesn’t matter which way you do it.  However, I do recommend that you use the pan frying method to cook it.  That way you can use the bacon grease to actually fry your cakes in.

IMG_0646

Ohhhhhh yes, looks good, doesn’t it?  Let me just say here that of all the things I love about Paleo, it’s the fact that you could eat bacon every single day and it would be fine.  Obviously we can’t forget about portions and all that jazz, but dang do I love me some bacon!

So, bacon is done.  Use a slotted spoon to remove it from your pan.  We’re trying to leave as much grease in the pan as we can.  Put the cooked bacon on a paper plate or a plate covered with paper towels.

In a medium bowl, mix your tuna, green onions, garlic, salt, pepper, and rosemary leaves together.  I like to add all the seasonings in at this point as opposed to later so I can give it a taste before the eggs go in to make sure it’s seasoned to my liking.  It’s worth noting here that you should remember that your bacon will add some saltiness to the patties, so don’t go crazy with the salt shaker.  And I’m not talking about your booty.

IMG_0647

Here is my tuna and spices in my bowl.  Exciting!

At this point your potatoes should be done or at least very close to being done.  When they are done, you should drain them, and then let them dry out a little.  I do this by setting them back on the burner, which usually is still hot enough to do the trick.  Don’t put the lid back on your pot, otherwise they won’t dry out.  Let the steam come up and out, and if they aren’t getting dry enough, turn the burner on very low and sort of shake the pan until they turn a light orange.  It’s important to let them dry out a little bit because I have found that sweet potatoes, not unlike a pregnant woman, tend to retain water.  If you don’t dry them out, your cakes will be super mushy and hard to flip.  Not fun.  But now that they’re DRY, you can mash those babies with a potato masher, fork, or (my weapon of choice) a large whisk.

Once your potatoes are mashed to your liking (whipped, lumpy, somewhere in between) let them cool for just a few minutes, then add them to your bowl with your bacon pieces, eggs, and coconut flour.

IMG_0648

Give it all a good stir now, either with a spoon or your hands.  Just make sure you get everything incorporated well.  It should look something like this:

IMG_0650

Ooh la la!  Not really, just looks like an orange mess, doesn’t it?  That doesn’t matter, because we’re about to get delicious up in here.

Remember that pan that you were frying your bacon in?  The one that has all that yummy scrummy grease?  Yeah, that one, get it going back on some heat.  Add a little extra oil of your choice if the bacon grease doesn’t cover the bottom of the pan.  We want to heat it to medium high.  However (and you know what I’m going to say next) don’t let it smoke!

Once the oil is heated, shape your mixture into patties and set them gently in the pan .  Mine made 9 patties total, with 4 cooking in the pan at a time.

IMG_0652

These will take about 3-4 minutes a side.  You want them to get a good crust going.  I always think the outer crust is the best part.  When they are done, set them on a paper plate covered with foil to keep warm, or pop them into a warm oven while you cook up the rest.

IMG_0654

And here is the final masterpiece, served with sautéed okra, garlic, and turnip.  These are good fresh, but I think they are even better reheated the next day.  The flavors really meld nicely together and it’s just delicious.  If you have nothing else going on for dinner tonight or lunch tomorrow, why not whip up a batch of these tuna bacon cakes?  I bet you have half the ingredients in your pantry and fridge already.  So go, cook some awesomeness.  Your tummy and taste buds will thank you!

Leave a comment »

Pining for Pancakes

Let me say before I “officially” start this post that I will try to delete any typos before sending this one to press.  However, if you come across anything that looks like “eaijo;h”, that would be my nine month old who is quite the little climbing monkey and can reach mommy’s laptop at any height.

IMG_0719

My apologies in advance.  Not that this is a professional blog.  We keep it real here at mommyinmassachusetts.  Word.

If there is one thing I miss about a non-paleo lifestyle, it is pancakes.  I LOVE pancakes.  I love making them for my kids.  I love that you can add endless things like fruits and jams and syrups to make them wonderfully delicious.  I love that fluffy buttermilk goodness that melts in your mouth.  I love walking into a diner and saying “short stack”.  I mean, c’mon, you cannot order any other food by the stack!  But now that we are paleo, pancakes are a distant memory.  Or are they?

…Honestly?  Yes, they are.  At least if we’re talking about those fluffy-came-from-a-Bisquick box buttermilk pancakes.  But can we make pancakes that are healthy and yummy at the same time?  You bet your sweet bippy we can!

These are Pumpkin Pancakes with Honey Cinnamon Syrup as made over at The Well-Fed Homestead.  This blog is the bees knees for some really great recipes.  The recipe below is the original recipe cut in half.  It made thirteen 3.5 inch pancakes.  I ate half of them. Shhhhh…

Ladies and Gentleman, the ingredients!

IMG_0690

For the Pumpkin Pancakes

  • 3 Eggs
  • 1/4 Cup Coconut Milk
  • 1 Tbsp. Melted Butter, Coconut Oil, or Olive Oil
  • 1/2 Cup Pumpkin Purée Mine came from a gal named Libby)
  • 1/4 Cup Honey
  • Scant 1 tsp Cinnamon
  • Just over 1/4 tsp Ginger
  • 1/8 tsp Cloves
  • 1/8 tsp Nutmeg
  • Scant 1 tsp Baking Soda
  • Sprinkle of Sea Salt
  • 1/6 of a Cup Coconut Flour (That’s half of a 1/3 cup measure)
  • Butter or oil for your pan

For the Honey Cinnamon Syrup

  • 1/2 Cup Honey
  • 1/2 Cup Coconut Milk
  • 2 tsp Cinnamon
  • 1 Tbsp Butter*

*The original calls for 1/2 Cup Butter.  I didn’t want to use that much, so I just added a Tablespoon.  The syrup thickened quite a bit, so if you wanted it slightly thinner, I would add more butter.

In a large bowl, whisk the eggs until blended.  Add in the coconut milk, melted butter or oil, pumpkin purée and honey.  Whisk to combine.  Once combined, add in your spices.

IMG_0694

Give your mixture another little whisk to combine.  Now, get your coconut flour (using the scoop and level method) ready.  Sprinkle a little over the top of your mixture like so:

IMG_0695

Whisk it well to combine, you don’t want any lumps.  The mixture will really start to thicken up and look like this:

IMG_0696

I know it seems a bit over the top, but adding that 1/6 of a cup of coconut flour a little at a time really makes it easier to get it all mixed in well.

Once you’ve added all your flour, it’s time to heat your pan or griddle.  You want it quite hot.  I heated mine until I could flick water in it and have it sizzle and dissipate almost instantaneously.  Once it’s hot, add in your butter or oil for cooking your pancakes.  Once that’s melted or moving easily around the pan, it’s time to make the pancakes!

One thing that I learned the hard way since it wasn’t mentioned on The Well Fed Homestead is that you really want to spread the batter out quite thin in the pan.  When I dropped my first batch in the pan, I just blobbed about 3 Tbsp into 4 little piles expecting it to spread itself out.  It didn’t, therefore it had a hard time cooking, which meant I had a hard time flipping.  So I recommend spreading them out a bit with your spoon as you drop them in.  Once I did that, it worked out great!  Here are 4 little beauts cooking:

IMG_0698

After each batch you will probably need to put some more butter or oil in your pan, since you want it well greased to get a good flip.

You can cook and serve as you go, or keep them in a pie plate in the oven on warm (about 200 for those of us that don’t have a warm button) until you’re ready to eat.

While you are cooking all your pancakes, you can get your syrup going in a small saucepan.  Whisk the 1/2 cup honey, 1/2 cup coconut milk, and 2 tsp cinnamon together in the saucepan and heat over medium heat.  Let it get good and bubbly for a minute (stirring here and there) before you remove it from the heat.  Now whisk in your butter until melted (do this a Tablespoon at a time if you are using more than 1 Tablespoon).  Let it stand to thicken.

IMG_0697

Mmmmm…syrup-y goodness!

And just like that, breakfast is ready!  I know, I know, these aren’t your fluffy pancakes, and they are a bit dense, but they are ohhhhhh so delicious and they really hit the spot on a cold morning.  Also, as a side note, don’t worry if they get a little bit dark.  Mine got quite dark but weren’t exactly burnt if you know what I mean.  They looked like this:

IMG_0700IMG_0701

Yum yum yum!

The best part about these pancakes is that they taste like pumpkin pie, and the syrup is nice and sweet, so my 2 year old thinks they are just like regular pancakes.

IMG_0707

We eat breakfast in our undies at my house.  No biggie.

My little Mister also loves these because he can eat them all by himself.

IMG_0704

Which really means he can smear them all over his face by himself.

My favorite thing about these pancakes?  Well, I ate half of them so I think you get the picture.  I also loved that there was syrup leftover, which made a great topping to my warm apple afternoon snack!

IMG_0709

You can’t go wrong with a dish that does double duty!

I hope you (and whoever you cook for) enjoy these pancakes as much as my kiddos and I did!

Leave a comment »

Korean Beef and Veggie Fried Rice: Homemade Takeout

WARNING! This recipe is the absolute BEST and EASIEST Asian dish you will ever make yourself.  People will LOVE this and assume it is a take away.  And it literally takes less than 20 minutes to make once you start going.  This is…(wait for it)…Korean Beef and Veggie Fried Rice!

The Korean Beef recipe was adapted from Elizabeth Bryants’ recipe on her blog Lizzy Writes.  Now Paleo friendly from head to toe, this is one of the most requested dishes from my husband.  Before we started Paleo eating, we obviously ate the Korean Beef part of this meal with brown rice.  I have, however, thrown together my very own fried “rice” recipe, using nothing but veggies.  If you can’t tell, I’m so proud of myself for coming up with this recipe on my own! (Although I am sure there is some sort of veggie fried rice recipe out there already).

Let’s begin with our ingredient list:

IMG_0678

For the Veggie Fried Rice

  • 1/2 Head Cauliflower
  • 1/2 Bag Broccoli, Cabbage, Carrot Slaw mix
  • 5 Baby Bella Mushrooms, washed
  • 1 Onion
  • 2 Eggs (not pictured)
  • 3 Green Onions
  • 1/2 Tbsp Chinese 5 Spice Powder
  • 2 Tbsp Low Sodium Soy Sauce
  • 1/2 Cup frozen peas, defrosted (I didn’t have any on hand today, but have thrown them into this recipe before)

For the Korean Beef

  • 1 lb. Ground Beef
  • 1/2 to 1 tsp Fresh Ginger, minced
  • 3 Cloves Garlic, minced
  • 1/4 Cup Low Sodium Soy Sauce
  • 1/4 to 1/2 Cup Honey to desired sweetness
  • 1/2 tsp Pepper
  • 1/2 to 1 tsp Crushed Red Pepper Flakes, optional, to desired heat
  • Bunch of Green Onions, diced, for topping

Kitchen Equipment you will need

  • Food Processor
  • Large Non-stick frying pan or wok with a lid
  • Skillet or medium pot
  • Assorted bowls, whisks, and stirring spoons

Let’s get started on the Veggie Fried Rice first, as this part takes the longest.  Get your food processor plugged in and ready to go.  Roughly chop your cauliflower into medium florets, removing as much of the hard stem part as possible.  Toss it into your food processor and pulse until roughly the size of rice.  Put your “rice” into a microwave safe bowl and cover, then microwave on high for 2 minutes.  This is just to soften the cauliflower a little bit so you don’t need to do as much stir frying later.

Next, toss your broccoli, cabbage, carrot cole slaw mix into the food processor.  It should be worth noting here that if yours is already diced, you can just leave it as is if you prefer.  Mine was in matchsticks, so I just pulsed it a few times to match the size of the cauliflower.  Put that onto a plate or into a bowl just to get it out of the way for a second.  Now put your washed baby bellas in the food processor and do the same.

Now, get your wok or frying pan going over medium low heat.  Whisk your eggs and a few drops of soy sauce in a bowl until they are light and fluffy.  Add a teensy bit of oil into your wok, swirl it around and let it heat up for a minute.  Then add your eggs.  You can do this one of two ways .  You can swirl the eggs around the pan until they are set, flip them once, and then remove them from the pan as one big piece of scrambled egg and cut them up.  Or you can do what I did and just scramble them as I would my breakfast eggs.  The result is the same: little bits of eggs in delicious fried veggie rice.  While your eggs are cooking, it would be a good time to quickly dice up your onion and green onions for use in just a minute.

So far, we’ve got eggs done, cauliflower is done in the microwave, onions are diced and ready to go, along with the mushrooms and slaw mix.  Now we’re going to turn up the heat in here!!  And by turn up the heat, I mean turn the burner up to medium high and add a splash more oil to your pan if need be.  When the oil moves easily around the wok, add the cauliflower, mushrooms, slaw mix, and onion.  DO NOT add the green onions yet.  You can also sprinkle your 1/2 Tbsp Chinese Five Spice Powder and your soy sauce over the veggies at this point.  I only said 1/2 Tbsp in the recipe because that’s all I added (I’m not a fan of anise flavored things).  If you LOVE Chinese Five Spice, go ahead and put more in to your taste.  As with all of my recipes, you should feel free to change and adapt it to your liking!

Alright, we’ve got our veggies going in the pan, and we’ll want to toss them around frequently so they don’t burn.  I stir fried mine until the mushrooms had sweated and most of the liquid had dissipated from the wok.  My suggestion is to keep tasting until it is cooked to a softness that you prefer.  When it reaches that point, toss in the eggs and the green onions, and stir to incorporate.

IMG_0681

Totally looks like restaurant fried rice, minus the peas, no?

Remove it from the heat and put a lid on your wok to keep your rice warm.  At this point, let your husband/wife and kids or boyfriend/girlfriend or whoever the heck is eating with you know that dinner is almost ready.  In our house it’s like I have to blow the 10 minute warning whistle to get everyone up and away from what they are doing, otherwise the food will be cold by the time they finally show up.

We are in the home stretch, isn’t this exciting?!?  You are less than 10 minutes away from hearing your taste buds sing!

Get your skillet or medium pot ready by turning on the heat to medium and throwing in a little oil.  Hopefully you have caught on with all my prior posts mentioning prep work and minced all your garlic and ginger already.  If not, that’s alright, it doesn’t take long.  Mince your garlic now if you haven’t already.  When the oil moves freely in the pan, add in your ground beef and garlic.  Cook, stirring frequently, until the ground beef is no longer pink.  While your ground beef is cooking, mince the ginger and whisk it together in a bowl with the soy sauce, honey, and pepper, as well as the crushed red pepper flakes if you prefer.

IMG_0683

I would start off with 1/4 cup honey and move up to 1/2 cup, tasting as you go until you reach your desired sweetness.  When the ground beef is done, add in your soy sauce mixture.  Stir well and let it simmer for a few minutes to get all the flavors mixing together.

IMG_0688

And we’re done!  Wasn’t that easy?  One paragraph for the main event of this meal.  I tell ya, that has got to be a record for me.

To serve this masterpiece, I would do layers in individual bowls with the “rice”, ground beef, and a few green onions on top.  OH!  That reminds me.  Do NOT skip the green onions on top of this dish.  They make the dish.  You wouldn’t believe it, but they truly bring out all the different flavors in such an amazing way.  So unless they make you ill or you are allergic to them, don’t skip them.  Back to serving….if you were going to sit down family style you could layer it the same way on a big platter.  Or if you were just making it up for yourself to have on hand for lunch throughout the week, you could just toss the beef in with the fried rice.  Whatever you decide to do, it doesn’t matter, because this dish will taste amazing no matter how you serve it!

IMG_0689

Now get stuck in my lovelies!


Leave a comment »

Turkey Burgers!

For anyone who follows this blog, I’m sorry I have been MIA for a little while.  We can not seem to shake this cold stuff that’s going around.  So between taking care of two sick babies and then taking care of my sick self, it has been a long week.  That doesn’t mean I stopped cooking, so lucky you, readers!  I have a backlog of recipes to share!

Today’s recipe is a spin-off of the Multiply Delicious Sweet Potato and Kale Chicken Patties.  Now, I am sure we can all remember back to our elementary school days when they would serve chicken patties for hot lunch.  They were horrendous, freezer burned and soggy.  These aren’t your elementary school patties.  They are the elementary patties’ hottie neighbor: foodie mid-20’s patty.

Here we go with our ingredient list!

  • 1 lb. ground chicken OR ground turkey (I used ground turkey, hence the title turkey burgers)
  • 1 bunch kale, LEAVES ONLY, rinsed and chopped
  • 1 smallish sweet potato, diced
  • 2 cloves garlic, minced
  • 3 green onions, thinly sliced
  • 1 tsp dried rosemary
  • salt, pepper
  • 1 egg
  • 1 tsp paprika
  • 2 Tbsp coconut flour
  • 1 tsp Dijon mustard
  • Choice of oil for your frying pan

To start, get your veggies prepped.  I know I say this all the time, but from experience, it’s easier to just do all the prep work first and foremost so you aren’t scrambling while you’re cooking.  Rinse your kale, remove the vein from the leaves, then chop into little pieces.  Next, peel your sweet potato and then dice into tiny cubes.  Slice your green onions and the peel and mince your garlic.  Once your veggies are prepped, start heating about 1 tbsp of oil in your pan over medium heat.   Once the oil moves freely around the pan, toss in your green onions and cook, stirring often, for about 2-3 minutes.  Add in your sweet potato and keep cooking until the potato is tender and easily stabbed with a fork or your spatula.  I let mine get a little bit brown on the outside, because I liked that pan fried flavor.  Once your sweet potato is tender, add in your kale and garlic.  Sauté until the kale is wilted and the garlic is fragrant.  Be careful if your pan is very hot when you put your kale in, especially if it has a bit of water on it from rinsing.  It may pop in any oil that you have in the pan.

Here is how it should look at the end of cooking:

IMG_0558

Yum yum yum!

Remove your veggies from the heat and set them aside to cool a bit.

In a separate bowl, toss in your ground chicken or turkey, paprika, coconut flour, egg, salt and pepper to your liking, rosemary, and Dijon mustard.

IMG_0559

Remove any rings you may have on and roll up your sleeves, because we’re diving in!  Squish that lovely cold meat between your fingers and blend everything together well.  Or, if you are not brave, you could stir and stir and stir with a spoon.  I had a friend who could NOT STAND the feel of ground meat on her hands, so the spoon option was the only way for her.  “Weird” is all I have to say to that.  Doesn’t everyone love squishing stuff with their hands as a kid?  When does that change?  Ahhhh well, moving on…

Add in your cooked vegetables and squish once again to blend everything together.

IMG_0561

Looking great!  Now, at this point you can either start cooking the patties/burgers, or you can put some plastic over top and put it in the fridge so all the flavors come together a bit more, or meld if you will.  The original post suggests (I believe) 4 hours to overnight in the fridge.  I suggest to do whatever you want.  I personally only made up my burger mixture an hour before I cooked it, and it turned out great.  So do what you feel my lovelies!

When you are ready to cook, start by heating some oil (enough to coat the bottom) in your pan over medium high heat.  Shape your meat mixture into patties and rest on wax paper so they are easy to grab when your pan is hot.  Gently set them in your pan and start fryin’!  Let them get a nice brown crust on one side before flipping.

IMG_0562

Perfection!!!

Continue cooking until brown on the other side and burgers are cooked through.  It won’t take too terribly long, because although they look thick and meaty, there are a lot of veggies in there taking up some burger space.  I made a little cut in the top and checked the juices, just to be sure.

For dinner, I served these with a side of roasted broccoli and beets and topped them with avocado.  For my husband and daughter I put them on buns so they could be eaten like burgers.  For lunch the next day, I crumbled some goats cheese on top.  Which is when I finally got this picture:

IMG_0564

The goats cheese set off the flavor of the rosemary perfectly, and I really wish I had crumbled it over top the night before.

What I really loved most about this recipe was the fact that it made 8 good-sized burgers from just one pound of ground turkey.  Which meant we could eat 2 of them without feeling guilty at all.  It’s better than a quarter pounder at Wendy’s, right?  Not to mention I could sneak in extra veggies for my daughter under the guise of a yummy burger.  Which makes me one happy mama!

Happy eating!

Leave a comment »

Oh My Banoffee Pie!

Another dessert post tonight my friends, and oh boy is this one a goody!  I love bananas in any form.  I used to eat them Elvis style with peanut butter on toast.  Now I throw them into smoothies or paleo banana pancakes for breakfast.  I actually prefer my bananas slightly green.  They are so sweet and clean tasting without the overly strong banana taste of a very ripe banana.  My husband also likes his nanners, and mentioned banoffee pie to me about a week ago, which is one of his favorites from back home in the UK.  I said I would do some research to see if I couldn’t throw together a paleo version.  And I did.

This recipe comes from a few different versions I saw online.  I didn’t want tartlets, and I didn’t want something stacked up in a mason jar.  I wanted a straight up put-it-in-a-pie-plate pie.  With whipped cream on top.  So I did my own little version, which I think came out rather nice.

IMG_0525

Here are our simple and few ingredients that will make our luscious banoffee pie:

  • 5 bananas, duh!
  • 1 tsp Vanilla (pure, or if you can’t afford it like me, extract)
  • 9 Pitted dates (or less if your bananas are very ripe)
  • 1 cup nuts (I just grabbed a can of unsalted mixed nuts and removed any peanuts)
  • 3 heaping tsp Almond Butter
  • 1/2 tsp Cinnamon
  • 1.5 Tbsp Unsalted butter or coconut oil
  • 1 Tbsp Honey (not pictured)

First things first, get out your food processor and a pie plate.  Put your nuts, cinnamon, butter or coconut oil, and honey into the food processor.  Process until it becomes crumbly almost like granola.  Mine looked like this:

IMG_0530

Spread it out on the bottom of your pie plate like so:

IMG_0531

Great, you are 1/3 of the way done!

Now, grab 2 bananas from your bunch, and slice them.  It’s times like these I wish I owned this banana slicer.  The reviews alone make it worth buying.  🙂  Now stop laughing at those reviews and keep slicing!  Thick, thin, it doesn’t matter as long as it covers your crust with a layer of banana slices.

IMG_0538

And don’t forget to save a few slices for the baby who is ramming his walker into you:

IMG_0543

Perfect.  Now, if you choose, you can rinse out or wash out your food processor bowl before this next step.  I didn’t because…well, I’m lazy and I didn’t feel like it.  It’s all for the same pie and there was only a hint of cinnamon stuck to the sides anyway.  Don’t judge.  Wash and rinse or read along to the next step.

Take your other 3 bananas and toss them in chunks into the food processor.  Add your vanilla, dates, and almond butter as well.  A note here that I mentioned up in the ingredient list: if your bananas are very ripe, drop your dates to about 5.  My bananas were still just slightly green at the top and bottom, so I threw in an extra few for a bit more sweetness.  Blend to a smoothie-ish consistency.  You don’t want to blend til it’s completely liquified, but you don’t want chunks of banana floating around.  That’s what the layer of sliced bananas is there for.  It’s doesn’t look too terribly appetizing, does it?

IMG_0536

But believe me, it’s ohhhhhhh so good.  Now, blob it on top of your sliced bananas and smooth it to the edges:

IMG_0544

At this point, if you so desired, you could dollop some whipped coconut cream (or heavy cream) on top.  I totally desired

IMG_0547

It looks measley, but it’s all I had left in my bowl.  If I would’ve had more, I’d have covered the whole thing in cream.  Yum yum!

As for storing this pie, I put mine in the freezer to help it set up a bit, then moved it to the fridge so it wouldn’t freeze solid.  And it isn’t going to last long there…It may not even make it through the night.

Et voila!  There you have it, a lovely (lacto with the cream) paleo banoffee pie.  Huzzah! as the British would say.

Huzzah!


Leave a comment »

Winner winner chicken dinner!

Tonight’s post was a HUGE winner at our dinner table last night.  Hence the title.  There’s not much that can go wrong with chicken in a creamy mushroom sauce and roasted veggies on the side.  It was super easy and quick to throw together.  So fast, in fact, that although I apologized to my hubby when he got in the door for dinner being behind schedule, we ate right on time.  The most time consuming part of this dinner was waiting for the oven to preheat.  What do you say we get to work on this delish dish?

This recipe was borrowed from a FANTASTIC Paleo blog called The Foodie & The Family.  I highly recommend checking it out.

Let’s talk ingredients:

IMG_0513

For your veggies you’ll need:

  • 1 Butternut squash that is big enough to feed you and/or your family
  • Enough beets to also feed you and/or your family
  • 3 cloves garlic, minced (not pictured)
  • 1.5 Tbsp Olive Oil
  • Sea Salt, Pepper

Preheat your oven to 400°.  Prepare a large baking sheet by covering it with foil, or just leave as is if you’ve got some elbow grease to clean it after.  Peel your butternut squash and your beets.  This can be done with a regular vegetable peeler.  Something to note: you will want to make sure you peel your beets over a cutting board or paper towels.  They will definitely leave a pink hue on your counter top, as I found out the hard way.  Also, if you don’t want pink hands, wear a pair of kitchen gloves while peeling and preparing the beets.  Cut your squash into 1.5 inch chunks.  You can cut your beets to equal size.  Or, if you feel like being cutesy and you have a small metal cookie cutter in a fun shape, you can slice your beets into 1 inch slices, then cut out your shape from the middle of the slices.  Toss your squash and beets onto your baking sheet.  If your cookie cutter left sizeable pieces around the outside of the shape, feel free to toss those on, too.  Drizzle the olive oil over top, then sprinkle with the sea salt and pepper.  You’ll also want to sprinkle your minced garlic over top now.  Toss around the pan to coat, or dig in with your hands and make sure that all your veggies get evenly coated with olive oil.  If you feel like your veggies aren’t coated, and a tad bit more oil and toss again.  Now pop those lovelies into the oven.

IMG_0515

Don’t they look so nice and colorful?  If you look closely you can see my beet stars.  Ah!  Love it!  Set your timer for 40 minutes.

Now you can take a minute and get your space cleared up.  This is especially helpful if your kitchen is lacking in space like mine is.  Ready to move on to the chicken?  Ok, let’s go!

IMG_0517

The items you’ll need for the chicken are:

  • 2 lbs. of chicken thighs (about 10 thighs)
  • 1 teaspoon poultry seasoning (the original recipe called for herbes de provence…yeah, didn’t have that hanging out in my freezer)
  • 2 Tbsp Coconut oil or other cooking oil (I used olive)
  • 1/2 onion, sliced
  • 1.5 cups mushrooms, sliced
  • 2 teaspoons minced garlic (about 3 cloves)
  • 1 cup chicken broth
  • 1 cup coconut milk (not pictured)
  • 1 tablespoon grainy mustard (I used dijon)

Heat your coconut oil (or olive oil) in a large frying pan over medium high heat.  Season your chicken thighs with salt, pepper, and poultry seasoning.  When the oil is hot (but not smoking!) carefully place your chicken breasts in the pan.  My frying pan was large enough to fit 9 thighs.

IMG_0519

Brown the thighs, about 5 minutes per side.  Turn the heat down so you don’t scorch the pan as you’ll be away from it for just a minute.  Remove them from the pan to a plate and cover with foil to keep them warm.

At this point, peek in at your veggies.  They should be at the 20 minute mark of roasting.  Give them a stir in the pan and return them to the oven.

Place your sliced onions, mushrooms, and garlic in the same pan your chicken just came out of.  Chicken doesn’t mind sharing.

IMG_0520

Sauté over medium heat until they are softened, about 5 minutes or so.  Add in your chicken broth, coconut milk, and grainy mustard, and stir until combined.  Something to note here: I opened my fridge only to discover that I had grabbed vanilla coconut milk at the store instead of plain coconut milk.  Luckily, I had recently made some coconut whipped cream.  Hmmm, worth a try, thought I.  So I threw in what looked like (to me anyway) one cups worth of coconut whipped cream.  It’s just whipped coconut milk, right?  The moral of this story is that it worked just fine and was delicious.  Moving right along…

Add the chicken back into the pan, turning it to coat in your delicious mustardy mushroom sauce.

IMG_0521

Ohhhhhh yes, the magic is happening!  Simmer the chicken in the sauce for about 10 minutes until the chicken is done and the sauce is thickened.  If it hasn’t thickened up the way you want by the time 10 minutes is up, use your thickener of choice.  I have recently been informed by a reader that arrowroot is a good paleo option, as is puréed cauliflower.

When your chicken reaches it’s 10 minute mark, hopefully your alarm for your roasted veggies is going off as well.  I highly recommend watching them after the 30 minute mark to make sure they don’t get scorched.  I love roasted veggies, but not when they are roasted to the point of charring (which almost happened to some of mine).

Now, arrange this delicious dinner on a plate as professionally as you can.

IMG_0522

Mine obviously leaves something wanting.  Thank goodness this plate was only for my hubby, so he didn’t mind the appearance.  Now, DIG IN!  The chicken is just amazing.  My 2 year old loved it.  My 2 year old who could live on hot dogs and spaghettios LOVED it.  Look at this face of joy:

IMG_0524

I apologize for the chewed food in her mouth, but that’s just PROOF that it’s in her mouth and she’s still smiling.  And what child wouldn’t love some fun food shapes on their plate as well?

Overall, this was just a great meal, and one that I’ll make again and again.  Enjoy!


Leave a comment »

I. Need. Chocolate.

Ladies, for the most part this post is for you.  We all have those times of the month where we want to consume anything that’s chocolate.  Your kids Easter bunny?  Yes please.  Those M & M’s that have been in the back of the cupboard for…well, you aren’t sure how long?  Why not?  We have no shame when it comes to how or where we get our chocolate.  In my case, the shame normally comes after the indulgence when I look in the mirror and see that gooey goodness stuck to my front tooth.  My reaction is that of an over-acting old-time film star: “My God!  What have I done?!?  Oh the HUMA”…ok, maybe it’s not THAT bad.  But I used to feel terrible after the monthly chocolate fiasco.  However, now that I have gone Paleo, I can have my chocolate and eat it, too.  Enter the dark chocolate coconut flour cake.

This was originally a recipe for Fudgy Coconut Flour Brownies.  I have not had a chance to delve into her entire blog site, but it looks amazing!  You should all go have a peek.

I am going to go ahead and throw in a disclaimer here.  You have probably begun to realize that for the most part, I follow the linked recipes as written, but with an ingredient tweak here or there.  This is because I am a firm believer in making do with what I have on hand, and seeing if I can make it work.  If I try it and I think it’s terrible, I won’t post it, unless I’m specifically asking for help figuring out what may have gone wrong.  On the other hand, if I make it and it’s pretty good and nobody in my house died from eating it, I’ll put it up here and see what happens.  And I am always open to suggestions, as I am new to Paleo and may not always get it right.  Also, you will never see me throw in words like “grass-fed”, “USDA certified organic”, or “honey from my personal hive”.  I, for the most part, cannot afford grass-fed beef.  I try to buy organic when I can afford it.  I will probably never have bees in my own hives.  But if you can afford these things, by all means, do it.  I just get a bit bothered by blogs that list ingredients like a status symbol, whereas I am about making uncommonly good HEALTHY food out of ingredients affordable to the common man.  Disclaimer ended.

Now where were we?  Ahhhhh yes, chocolate.  Whisks at the ready?  Here we go.

You will need:

  • 1 and a half sticks butter (12 Tbsp or 3/4 cup) or 3/4 cup Ghee, melted *I used unsalted butter*
  • 1 Ghiradelli 100% Cacao Unsweetened Baking Bar, minus 1 square, chopped
  • 9 eggs
  • 1 cup honey
  • 3/4 tsp vanilla
  • 3/4 tsp sea salt
  • 3/4 cup coconut flour

Preheat oven to 350° F.  I greased two 9 inch pie dishes here.  You can either do that or grease a 9×13 cake pan like the original recipe.

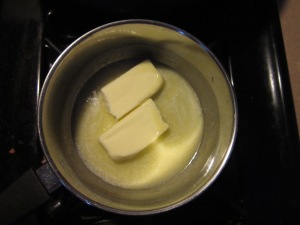
Put your butter or ghee into a saucepan on very low heat.

IMG_0502

You want it to melt slowly and not burn.

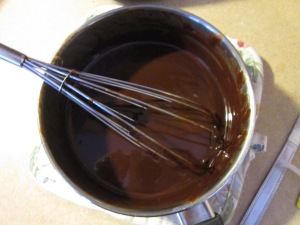
Once butter is melted, add your chopped chocolate, and whisk whisk whisk as it melts so that it does not burn in the saucepan.

IMG_0503

Once your chocolate has melted, remove the pan from the heat and set aside, preferably on a hot pad (your counter tops will thank you!) or a cool burner.  At this point, it will look like chocolatey goodness, and you will be tempted to dip your finger in and give it a taste.  Unless you love really dark bitter chocolate, don’t do it.  I’m pretty sure my face was frozen in a weird pucker type grimace for about 20 minutes after.

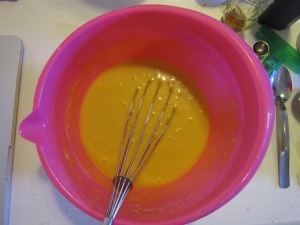
Now, grab a clean bowl and whisk.  It’s time to get crackin’!  Get your eggs all into the bowl and whisk until they are well blended.  Add in your honey, vanilla, and sea salt, and whisk again.

Now for the coconut flour.  All Paleo bakers know what a finicky ingredient coconut flour can be.  Measure out 1/4 cup, using the spoon and level method, which means use a spoon to place small amounts in the measuring cup until it’s overfilled, then use the handle of the spoon or a knife to level off the top.  Sprinkle the 1/4 cup over your egg mixture, then whisk well.  You don’t want any lumps.  Repeat this 2 more times until the full 3/4 cup of coconut flour is well blended with the other ingredients.  It should look very smooth, like this:

IMG_0505

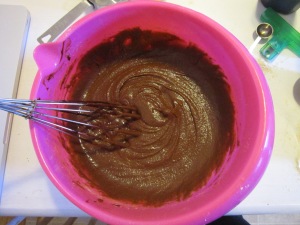
Finally, last but not least, grab your saucepan of buttery cacao off the stove and add it to your bowl.  Whisk well one more time, scraping the bottom to be sure everything is blended.  As the original recipe states, if you don’t mix it well enough, you’ll end up with yellow spots in your lovely dark chocolate cake.

IMG_0506

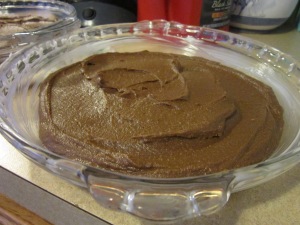
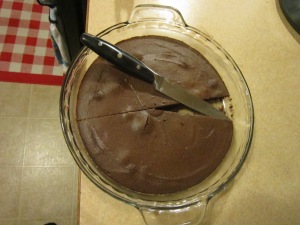
Divide the mixture evenly between your prepared pie plates or put it all in your cake pan.  Spread the mixture with a spatula til it reaches the edges and smooth the top.  Then lick said spatula clean.  Better get the whisk, too.  And I think there’s some left in the bowl…

IMG_0508

Place on the center rack of your preheated oven and set your time for 20 minutes.  After 20 minutes, check the doneness of your cake with a cake tester or a toothpick in the center.  When it comes out clean, it’s done!  My cakes only took 20 minutes, but I’m sure this will vary oven to oven.  If your cake isn’t done, I would test it every 2 minutes after the 20 minute mark til it is.

IMG_0512

Remove from oven and let cool for as long as you possibly can before digging in.  I served this with a dollop of ice cream on top for my daughter and hubby, and some coconut whipped cream on top for me.  This would also be great with a raspberry sauce over top of the whipped cream.  I am considering this as an option for my daughter’s birthday cake if I can find a nice cream cheese frosting for between the layers (we’re kind of lacto-paleo in our house if you haven’t noticed).

A note on storing:  Remember this is an egg based cake.  It should be stored in the fridge and eaten as quickly as possible (which shouldn’t be too hard!)  I froze one pie plates worth last night, so when I defrost it I will let you all know how well it freezes!

Go make this cake!  Or at the very least, try the original recipe.  It will satisfy any chocolate lovers’ cravings!


Leave a comment »

Curry, anyone?

My title may be a little deceiving as the recipe I am sharing with you today is actually titled “Coconut Chicken Casserole”, and can be found in the (I believe) January issue of Good Housekeeping.  Or here if you don’t subscribe. However, don’t be fooled.  The ingredient in this dish that will give you that lovely heat and kick that we all love is green CURRY paste.  Nom nom nom…drool drool.  *ahem*  Ok, so moving right along…

Our ingredients for tonight’s dish are as follows:

IMG_0464

  • 1 Tbsp Canola oil
  • 1.5 lbs chicken thighs, cut into 1.5 in. chunks
  • 1 medium onion, sliced
  • 1 medium bell pepper (any color) cut into 3/4 in. chunks
  • 2 Tbsp green curry paste (woot woot!)
  • 2 tsp freshly grated ginger
  • 1 cup low-sodium chicken broth
  • 1 large sweet potato cut into 3/4 in. chunks
  • 3/4 cup light coconut milk
  • 1 tsp cornstarch
  • 2 cups sugar snap peas
  • 1/2 cup cilantro, chopped (not pictured)
  • 1 head cauliflower
  • 3 green onions (not pictured)

A couple of things to note.  This recipe is not branded as Paleo.  The only thing I can see that isn’t Paleo is cornstarch.  I have yet to figure out what to use as a good thickener in these types of recipes, so I stuck with the cornstarch.  If you know of something else that works that IS Paleo, please, by all means, let me know!  Next note.  Chicken thighs.  I LOVE chicken thighs.  Inexpensive, juicy…they are just as good as chicken breasts.  Technically you could use boneless skinless breasts here, but why would you?  Go for the thighs!  Also, as you can see in the recipe, I have sugar snap peas listed, but green beans in the picture.  My local grocery store was out of snap peas when I went, so I had to make do with green beans, which I washed a trimmed.  I have also included a semi-recipe for cauliflower rice that comes at the bottom of this post.  Hence the cauliflower. 🙂

First, get all your prep work out of the way.  Peel and chop all your veggies, and grate your ginger.  Also, trim your cauliflower and either toss it into your food processor in small amount until the size of rice, or chop by hand to the size of rice.  Here are my prepped veggies:

IMG_0471

Don’t they look lovely?

Now to the good stuff.  Let’s get cooking!

In a 6 quart Dutch oven (which I have discovered in layman’s terms means a heavy pot with a lid), heat the 1 Tbsp canola oil on medium high heat.  Once it easily swishes around the pot, but is NOT smoking, add your chunks of chicken and sprinkle them with 1/4 tsp sea salt.

IMG_0473

Cook for 5 minutes or until it’s all browned (there should be no pink parts showing).  Use a slotted spoon and remove the chicken from the pot and into a bowl.  Add the sliced onion and chunks of bell pepper to the pot.  Cook and stir for 3 minutes, then stir in your curry paste, ginger, and another 1/4 tsp of salt.

Once they are combined, add the chicken broth and sweet potato.

Heat all those yummylicious ingredients on high until boiling.  Slap your lid on the pot and cook for 5 minutes.

Once your 5 minutes is up, stir in your chicken which has been waiting patiently in that bowl off to the side.  Reduce the heat to maintain just a simmer.  We want the chicken to feel like it’s in a nice jacuzzi, not like it’s riding a searing hot geyser.  Put the cover on and give it some privacy.  10 minutes or so will do, until the chicken is cooked and the veggies are tender.

Whisk the coconut milk and cornstarch in a little bowl until smooth.  Stir into the pot, then add the peas.  Crank that heat up to high again until the casserole is boiling, then cover and simmer on medium heat for 3 more minutes or until your peas (or green beans!) are hot.

IMG_0476

Yummmmm yum, looking good!

Serve with 1/2 cup cilantro over cauliflower rice.  What’s that you say?  You’ve never heard of cauliflower rice?  Allow me to enlighten you.  It’s simply cauliflower, chopped or food processed to the size of rice, then microwaved or sautéed in a pan with a little oil until tender.  You can add anything you want to flavor it, including onions, garlic, any seasonings you desire, cilantro, etc.  The combinations are endless, and it really does make you feel like you are eating a meal with rice.  Which is important to those of us who have not long been on the Paleo bandwagon!

So there you are my darlings, a little curry to spice up your night.  Enjoy!

3 Comments »

Paleo what?

So obviously I took a bit of a hiatus…like, a seriously long hiatus from this blog.  About 7 months or so.  When I started this, my son was a month old.  Which means no time for anything but changing diapers and doing feedings and trying to remember to feed his sister and myself.  But I am back!  And I’m turning this into a fitness/paleo/fashiony/whatever strikes my fancy sort of blog.  I’ve really gotten into Paleo eating since I started this, among other things.  So without further ado, here is one of the recipes I tried recently, with accompanying photos.  Please excuse my crap camera work.  🙂

This recipe was originally listed as a crock pot recipe for a Paleo Hungry Man Sweet Potato Casserole.  I prefer my crock pot meals to be kind of throw and go, whereas this one required a lot of prep work.  If I’m going to do so much prep, I want (somewhat) instant gratification.  I generally followed the original recipe, tweaking only a bit here and there.

Here are the cast of characters for this Paleo meal:

IMG_0482

We have:

  • 1 lb. Ground Beef
  • 5 smallish sweet potatoes (this was more than enough for the recipe)
  • 1 large red onion
  • 1 medium yellow onion
  • 1 cup frozen peas, defrosted in the microwave and drained
  • 2 cloves garlic
  • Sea salt
  • Pepper
  • Paprika
  • 1/2 lb. bacon (not pictured, it skipped picture day)
  • 6 or 7 eggs (also not pictured, they were hanging with bacon)

Preheat your oven to 400 degrees F.  Get your medium sized casserole dish (with a lid) ready by greasing that baby up!  I used a bit of olive oil and rubbed it around the bottom and edges with a paper towel.  Now it’s time to start your bacon.  Get a skillet going over medium/medium high heat.  You can dice now and then cook, or cook now and crumble later.  I chose to dice first, and cut mine into little strips.  Cook bacon til it’s getting crispy, or to your liking.  When its done, scoop it out with a slotted spoon and put it on paper towels or a paper plate.  Drain your bacon fat into a glass jar (it’s bad for your drain!).

Mmmm...Bacon

While that bacon is cooking, you can multitask and start prepping those veggies.  Toss your cup ‘o’ peas into a microwave safe dish with a tbsp. of water and cover.  Microwave them on high for 2 minutes.  Remove (careful, they’ll be hot!) and drain.  Set aside for later.  Get your sweet potatoes naked (peel them)

Nakey Taters

Here, the author of this recipe has you microwave the potatoes for 2-3 minutes to soften them, THEN he has you slice them thinly.  I personally put them through the slicer on my handy dandy food processor and THEN I put them in the microwave to soften them (in a lidded microwave safe bowl, of course).

Sliced and diced!

Regardless, as a common theme, be careful when removing them from the microwave, they will be hot!  Dice your onions into large-ish chunks, and mince your garlic (I always cheat and use a garlic press).

Prepped veg

Now, hopefully after all those veggies are prepped, your bacon will be crispified and draining on those paper towels, and we can move on to the ground beef.  Toss the ground beef, onions, and garlic into your skillet that you just drained the bacon grease out of.

Cook that meat!

When I made this, I actually forgot to drain the bacon grease.  If you forget too, worry not, just use your slotted spoon and sort of squeeze the meat against the side of the skillet to drain the fat as you add it to your casserole dish.  Cook the mixture until the meat is all browned and the onions are translucent.  Toss in your peas and stir to combine.  You should also season to your liking here with salt, pepper, and paprika.  You can realistically throw in any spices/herbs that sound good or appeal to you.  I think rosemary would be amazing in this recipe, but I only used good ‘ole S&P and Paprika.  While your meat mixture is cooking, you should crumble your bacon if you chose to fry it in whole strips, and also whisk your eggs in a bowl so they are blended.  You can also season your eggs with more paprika/seasonings.

Now for assembly, HOORAY!  First, layer your sweet potato slices.  Be careful, as they may still be hot from the microwave.  Just a single layer will do.

Layer one

Now, throw on some scoops of that yummy meat mixture.  Sprinkle some bacon pieces on top of that.

Layer 2

Repeat with sweet potato slices, meat mixture, and bacon pieces.  Keep repeating til you run out or food or space for layering.  I had enough space in my casserole dish for 3 layers, plus an extra layer of sweet potatoes on top.

Now, once all your layers are in place, pour your seasoned, whisked eggs over all of it.  The eggs will sink down into the little spaces between the layers to hold it all together.

Now, I did not cover mine to start, although I would recommend covering first, and uncovering at the end to brown.  I did it backwards and put it in uncovered for about 30 minutes, then covered for 10 til the sweet potatoes were easily stabbable with a knife.  Had I put my thinking cap on, I would’ve covered and then let it brown for the last 10-15 minutes uncovered.

Oh well, it still came out AH-MAZE-ING!!!!!!

Nom noms

My 3 year old even like it, especially since she could see the bacon and eggs (she’s a big breakfast fan).  The sweet potato slices on top got a little bit crispy, so she thought they were chips.  Fair enough!

Layered goodness!

My hubby and I agreed that it was great as a dinner, but would be just as good served as a breakfast casserole.  I served it with a side broccoli and cauliflower tossed with olive oil, sea salt and pepper  (it roasted alongside the casserole for 30 minutes, mixing twice).  At breakfast it could be served with mixed fruit on the side to lighten it up.

You should definitely give this recipe a whirl!  I promise you won’t be disappointed. 🙂

Leave a comment »

Shout out to my Baby Daddy!

As we have all been reminded ten thousand times by all the card companies, the golf courses, our nearest restaurants, it’s fathers day!  Today is a day when dear old dad shouldn’t have to lift a finger.  His favorite beer should be brought to him on a silver platter, along with maybe a sandwich, his favorite sweet treat, and the remote control.  His every whim should be replied to with “yes, dear”.  His golf score should go without comment from the peanut gallery, although you know he is always over par.  Yes, this is a day to celebrate dad and all he’s done for his wife and kids.

To mark the occasion in our household, my hubby, David, was given cards from me and the kids (I still can’t believe I’m saying kids now.  Kids.  PLURAL!).  It was all very ceremonious…all of us still groggy from sleep, me not even having had my morning cup of coffee.  He smiled with each card and said the appropriate thank you’s, and then the day went on as normal.  I had informed my husband the day prior that his father’s day gift would be the chance to play golf after church.  This is something he has not done since before little Rhys was born, just over a month ago.  He was grateful for the opportunity.  So by the time I finally had my coffee I was beginning to mentally prepare for dealing with the kids by myself for the afternoon on a day when hubby was normally here to help out.  I thought of places we could drive to just to kill time, parks we could go to where Abigail could play and Rhys and I could sit in the sun and relax.  And then, as happens more often than not in our house, the day got in the way of our plans.  I had high hopes for the day going well.  I really, REALLY did.  But there is just something about making plans when you have a toddler and a baby.  As soon as you make them you may as well hang them up.  It’s like as soon as you say it out loud, it won’t happen.  And I jinxed us, boy did I jinx us.

My first mistake: “honey, would you like some wakey wakey eggs and bake-y?”.  The words left my mouth and no sooner did Rhys begin to cry.  Hubby was able to settle him in his swing, but we couldn’t make it through the first few bites of our bacon and eggs before he began fussing again.  Our lovely Father’s Day breakfast was scarfed at warp speed.

My second mistake: “I’m going to get around for church”.  This typically goes off without a hitch.  We normally can get around and out of the house on time.  But today just wasn’t one of those days, and it wasn’t even the kids or hubby.  It was me.  Ladies, you know those days when the weather gets just a little bit cooler, and all you cooler weather stuff is MIA for some reason, so suddenly you have nothing to wear but jeans and a hoodie, which for a trip to the market is fine but church…not so much?  Yeah, this was one of those days.  I went through maybe five wardrobe changes after my shower…five.  I went into the shower with an hour and a half for all of us to get ready.  I came out of the bedroom in what I thought would be an okay clothing choice only to feel mismatched and uncomfortable, and with only a half hour left on the countdown clock.  Strange how time flies when you can’t find a darn thing to wear.

At this point I decided it wasn’t worth it to change, I was fine in what I had on.  Hubby got Abi ready and headed to take out the trash.  I got Rhys ready.  By the time Abigail and hubby got back, I could see a wet patch on Abigail’s behind.  As hubby went to get a change of clothes for Abi, I asked aloud, “is this really our life now”?  I looked around at the mess in the living room, the dirty dishes in the sink, the crying baby next to me and felt defeated for the day.  We did not make it to church.

Instead I threw on that hoodie and we headed to Walmart to shop away our troubles.  $42 later and we were headed to get ice cream to eat away our troubles.  Somehow the troubles were following us.  Surely some more shopping at the grocery store would make me feel better!  Nope.  We came home, got Abi into bed for a much needed nap and sat on the couch.  “How is it,” I asked David, “that we have been gone for less than 4 hours, but it feels like all freaking day?”  He did not have an answer, he just sat and held my hand.  And then he said those magic words…”I’m not going to the golf course today”.

Now, here is the point where all my ramblings make sense.  By my standards, we had a crap day.  Crying kids.  Multiple diaper changes (some nastier than others).  I wasn’t feeling great about myself, and therefore the entire house knew about it.  But to David, it was okay.  Sure he could’ve left the screaming kids and diapers and messy house and grumpy wife behind and hit a few balls around the golf course.  Especially since it’s Father’s Day for crying out loud!  Instead he was absolutely the best dad and hubby a girl could ask for.  He did what was best for me, for his children.  And for that I’m so grateful and proud to call him my husband.  He is what I think fathers everywhere should be.  Not only a great influence for his kids, but also a support to his wife.  David’s true colors shown through on a day that was supposed to be his day off, his “I do what I want” day.  He proved himself as a real man, a real family man.  And I’m so lucky that he’s all mine.


Leave a comment »